Your Guide to Pruning Trees and Shrubs
For gardeners who can't wait to get outdoors and begin working, late winter and early spring are great times to prune, before trees and shrubs begin to put on new growth. Besides pruning for safety and to enhance the health of the tree, pruning can also improve flower and fruit production. Use our guide below to help select the right pruner for the job, to learn how to sharpen and maintain your pruner, and for general pruning techniques.
PRUNER SELECTION
Types of Pruners
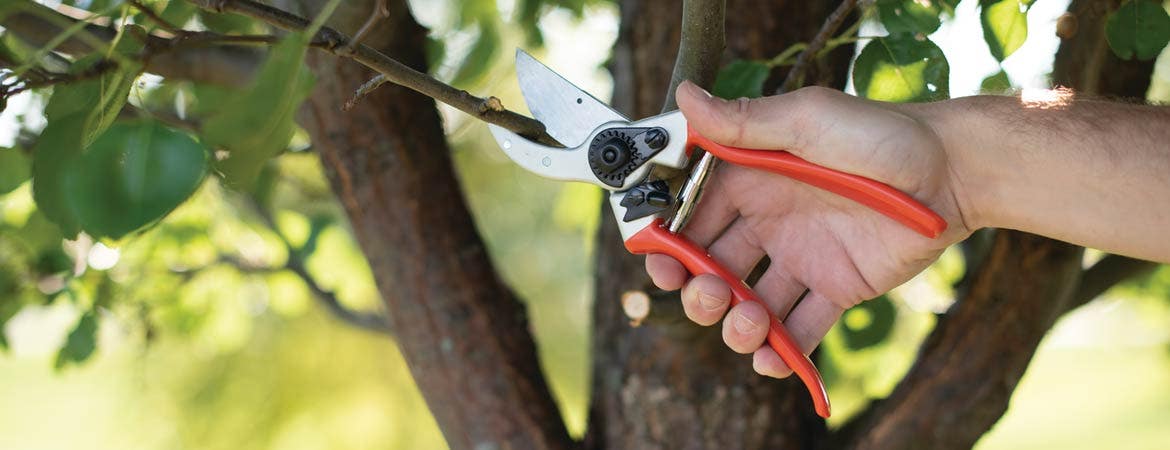
Bypass: Designed for cutting live wood. The cutting blade ‘passes by’ the counterblade in a scissor-like action. The hook shape of the counterblade helps to hold the branch steady during cutting. As a side note, the counterblade is going to crush the bottom of the branch a little bit, so whenever possible cut from the side of the branch that positions the counterblade under the wood you are removing. Shorter blades make precision cuts easer, but longer blades give you a little more reach, and longer handles increase your leverage.
Anvil: Designed for cutting old, hard, brittle and dead wood. The cutting blade drops into the middle of the anvil, sometimes into a small slot that is cut to receive the blade. The anvil supports the branch underneath to reduce the chance of it splintering. The anvil is going to crush the bottom of the branch a little bit on either side of the cutting blade, so it is best to use an anvil style pruner on dead wood.
Double Cut: Some people prefer a ‘double cut’, which means there isn’t an anvil or counterblade, instead there are two cutting blades. The edges of the blades don’t actually close directly on each other, they are sharpened on different sides so the cutting surfaces just miss each other, and the blades nest together.
Handle Style
There are many handle styles and shapes available including those for left-handed users, or for someone with smaller hands. Ratcheting action can multiply cutting power, but can take several squeezes to make a cut. Latches are positioned in different places along the handle; it’s nice to have a latch you can open with just one hand. Rotating and ergonomic handles offer added comfort and reduced blistering while pruning all day.
Cutting Capacity
Cutting capacity doesn’t mean you can actually cut that size branch, it is the distance between the blades of a pruner. True cutting capacity depends on the hardness of the wood, and the strength of the user. If a cutting capacity is .75 inch, you will be able to cut that size linden without any problem, but unless you are unusually strong you aren’t going to get through .75 inch dead white pine. If you have to strain to make cuts, it can result in ragged cuts and cause damage to the pruner by twisting it. In this case, consider moving to a lopper or a saw to prevent unnecessary damage.
PRUNER SHARPENING & MAINTENANCE
- If your pruners are getting sticky from sap, kerosene, alcohol, or a light oil like WD-40 will dissolve the sap and help your pruners move freely.
- Sharp pruning tools cut with less effort and the clean cuts heal faster.
- A smooth, single cut mill file or stone should be used on straight edge pruning shears.
- Sharpening your blade before it gets very dull can save you effort. Take your file or your stone in the garden with you, and touch up the blade as necessary. A can of WD-40 can be used to free up sticky pruners as well.
- If the cutting blade is extremely dull, or has been notched, it may be necessary to use a vice, or to take the pruners apart to repair the damage. Sometimes it is easier just to buy a new blade, rather than trying to repair a badly damaged blade.
- Maintain the factory angle on the cutting edge. If the blade is filed flat and/or too thin, with no bevel, the edge will dull quickly, and can chip or roll.
- Sharpen away from the blade, not toward the blade.
- Sharpen only the blade, not the anvil.
- Sharpen a bypass pruner on just one side of the blade. Avoid filing the flat side of the blade, except to remove any burrs from filing the edge side. A wire brush may suffice in removing the light burrs that may appear.
- Sharpen an anvil pruner and a double-cut pruner on both sides of the blade.
- Use one straight motion when sharpening. Do not "scour" back and forth. This will heat the edge unnecessarily.
- Hooks or notches on straight edge shears rarely need sharpening.
- Wavy edge hedge shears may be sharpened with a tubular, fine stone or tubular file. Do not use a file with a flat side, as this will not follow the contours of the wavy edge.
- After sharpening, apply light machine oil to the complete blade.
- Store your pruning equipment in a protected environment.
- A turbo-cut saw is very difficult to sharpen; it is usually less trouble just to replace the blade.
- Impulse hardened saw blades cannot be sharpened.
PRUNING TECHNIQUES
- Choose the right size tool for the job. If you have to strain to make a cut with a pruner, then the pruner is too small for the job, resulting in ragged cuts and possible damage to the pruner. Don’t twist the pruning shear; instead ‘open’ the cut on the branch. Bend the branch away from the cut to open it and make room for the cutting blade.
- Use hand pruners for branches no larger than the size of your little finger.
- Don’t use loppers for branches larger than the size recommended by manufacturer. You may not be able to prune to the full maximum thickness, depending on the hardness of the wood.
- When using bypass pruners, the anvil should be on the side of the branch being removed to avoid crushing the branch collar.
- Use sharp tools to ensure good cuts and encourage callousing. If disease is suspected, clean your tools between cuts.
- When pruning larger branches with a saw, undercutting first will help avoid damaging the tree. Use the ‘3-cut’ technique.
- Beware of overhead utility lines when using a pole pruner or when you are on a ladder.
- Pruning without a good reason may do more harm than good. If you are confused about which branches to remove, start with these guidelines: Remove branches that are 1) broken or dead; 2) diseased or dying; 3) rubbing or crossed; 4) growing toward the center of the plant.
- Generally, the only reason for pruning paint is to hide your cuts.
- In Midwest climate, it is best to avoid any elective pruning from August until we have had a hard frost. The natural response to pruning is growth, and new growth initiated late in the growing season will not be winter hardy. Evergreens should not be pruned during sub-zero weather. It's best to prune pines when the buds are in their candle stage. Spruce and fir are best pruned when the buds are dormant.
- Avoid pruning three tree species until they leaf out: walnut, maple and birch. If they are pruned earlier, they will "bleed" excessive sap. "Bleeding" will not hurt a tree, but it may stain the bark. All other trees may be pruned before leafing out.
- You can do light pruning at any time. Broken, dead, weak or heavily shaded branches can be removed with little effect on a plant, no matter what time of year.
- When you are pruning, step back and look at the plant to get the big picture.
- Do not prune spring-flowering shrubs, such as forsythia or lilac in the summer; you will remove flower buds that already exist, and diminish flowering for this season. Instead, prune them just after flowering, as their blooms are beginning to fade.
- Rejuvenating an overgrown flowering shrub like a lilac is a simple process, but it is done in stages over several years. Most lilacs send up lots of new shoots from the base of the shrub each season. Look at the base of your plant to see if it is suckering (sending up new shoots from below the ground). Right after it finishes blooming, prune out a quarter to a third of the oldest, woodiest stems an inch or two from the ground. You can also shape the remaining top-wood now. In response, the lilac will send even more sucker stems. Repeat this process yearly and within a few years you will have a whole new plant that is much more compact and productive.
- Avoid removing more than 1/3 of a plant in a season.
- The narrower the angle of a branch, the weaker the crotch.
- Flush cuts can delay healing and allow decay into the tree. Avoid cutting into the branch collar.
- While young trees and shrubs can readily replace tissue that has been pruned out, older trees may not. Avoid thinning of branches on older, established trees.
- It helps when pruning to understand a little about buds. Here is a brief overview:
- Almost all growth comes from buds.
- Buds can grow into leaves, branches or flowers.
- There are several types of buds: dormant, latent and adventitious.
- Dormant buds were formed last season for this season growth.
- Latent buds are there, but remain inactive, like an insurance policy.
- Adventitious buds are those that quickly form in response to a need, but they aren't "deeply rooted", resulting in weak growth.
- Buds located at the tips are called terminal buds.
- Buds located on the sides are called lateral buds.
- Terminal buds give off a hormone (auxin) that suppresses other growth. This is called ‘apical dominance’ and it organizes the growth of a plant.
- Pruning off the terminal buds will remove the hormone that delays the lateral growth resulting in a bushier, fuller plant.
- Prune 1/4” to 1/2” above the bud that you are using to direct future growth, angled away from the bud.
If you still have any questions about pruning, send us an email at customercare@gardenersedge.com. We’d love to help!